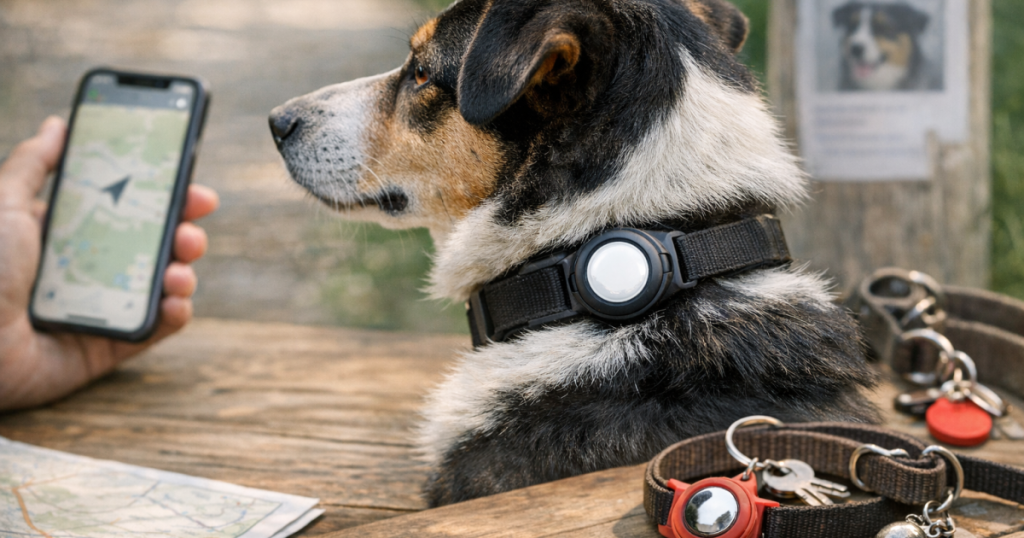
An AirTag dog collar setup can be a useful backup when your dog slips out near houses, parked cars, or busy parks, but it should not be treated like a live GPS tracker. The Apple tag depends on nearby devices in Apple’s Find My network, so the same setup that helps in a suburb may go quiet on an empty trail or rural road.
Pairing Apple AirTag (2nd generation) with the Elevation Lab TagVault AirTag Dog Collar Mount is mostly about three jobs: confirming the mount fits your exact collar and tracker, attaching it so it stays comfortable during real movement, and practicing the recovery steps before your dog is missing.
The short version
- Compatibility: Use a TagVault model made for AirTag, and confirm the current product listing supports the AirTag generation you own.
- Mount fit matters: Check collar width, thickness, buckle position, leash ring placement, and whether the mount rubs when your dog eats, sniffs, sleeps, or pulls.
- AirTag is not GPS: It does not provide the same live tracking behavior as a cellular or satellite GPS dog tracker.
- Neighborhood usefulness is real: An AirTag can help when other Apple devices pass nearby, which is more likely around homes, sidewalks, stores, apartment buildings, parking lots, and parks.
- Rural and hiking limits are significant: Fewer nearby devices usually means fewer location updates.
- Safety is part of setup: Watch for chewing, snagging, collar loss, rubbing, and whether the extra bulk bothers a small or sensitive dog.
For a broader explanation of the recovery role, read our guide to what Bluetooth trackers can and cannot do for lost-pet recovery.
What the TagVault mount is doing
The TagVault mount’s job is physical, not digital. It holds the AirTag on the collar so the tag is less likely to dangle, twist, or fall off during normal dog movement. That matters because loose key-ring style holders can be annoying for some dogs, easier to chew, and more likely to get caught on brush, crate bars, or another dog’s mouth during play.
Before you install it, check the specific TagVault version you have. Accessory designs can change, and compatibility depends on the mount revision, the AirTag generation, and the collar you plan to use. Do not assume that “fits AirTag” automatically means it fits every collar on every dog.
Compatibility checks before you attach it
- AirTag generation: Confirm the mount is listed for the AirTag you own, including Apple AirTag (2nd generation) if that is what you are using.
- Collar style: Flat collars are usually easier to assess than rounded, padded, rolled, elastic, or unusually thick collars.
- Collar hardware: Make sure the mount does not block the buckle, adjustment slider, ID tag ring, leash D-ring, or quick-release clasp.
- Dog size: A mount that seems minor on a large dog may feel bulky on a toy breed, narrow-necked dog, puppy, or senior dog with sensitive skin.
- Coat and skin: Long coats can hide rubbing, while short coats can show pressure points quickly. Check both.
Step 1: Pair and label the AirTag before it goes on the collar
Set up the AirTag in Apple’s Find My app before sealing it into the mount. Give it a clear name that you will recognize under stress, such as your dog’s name plus “collar.” If the app offers contact or lost-item options, complete those fields with current information before you ever need them.
Do this indoors at a table, not while your dog is bouncing around waiting for a walk. Confirm that the tag appears in the app, that your phone can see it, and that any sound or nearby-finding tools available on your device work as expected. The point is not to perform a perfect lab test; it is to avoid discovering a pairing problem after a gate is left open.
Step 2: Seat the AirTag in the TagVault carefully
Follow Elevation Lab’s current instructions for opening, seating, and closing the mount. Do not force the AirTag into place, trim the mount, leave parts out, or modify the attachment to make it fit a collar it was not designed to fit. A mount that is over-stressed during installation may be less reliable when your dog scratches, rolls, or runs through brush.
Once closed, gently press around the edges and attachment points. You are checking for uneven gaps, loose movement, or any sharp-feeling edge that could rub the dog’s neck. If the mount has screws or closure points, verify they are secured according to the maker’s instructions without over-tightening.
Step 3: Choose the safest collar position
The best position is the place where the mount is secure, visible enough to inspect, and least likely to bother the dog. For many dogs, that is not directly under the chin, especially if the mount hits the bowl while drinking or presses into the throat while sniffing. The side of the collar can work better, but only if it does not slide into an awkward position.
Put the collar on using your normal fit check: snug enough that the dog cannot easily back out of it, but not tight. Then watch your dog do ordinary things for several minutes.
- Let your dog lower their head to sniff the floor.
- Offer water and watch whether the mount clacks against the bowl or changes how they drink.
- Clip on a leash and check whether the leash hardware collides with the mount.
- Have your dog lie down, roll, shake, and turn in a small circle.
- Look under the collar after 10 to 15 minutes for flattened fur, redness, or irritation.
If your dog paws at the mount repeatedly, freezes, refuses to walk, or tries to chew it, stop and reassess. A recovery device is not helpful if the dog is miserable wearing it or manages to remove the collar.
Step 4: Run a realistic neighborhood test
Do not wait for an emergency to learn how the AirTag behaves in your area. Start with your dog safely leashed. Walk your normal block, a nearby park path, an apartment hallway, or the edge of a shopping area where dogs are allowed. Watch how the Find My location changes over time, and notice where updates seem more frequent or less frequent.
Then do a controlled non-dog test. Place the collar and mounted AirTag in a safe location with a family member, or have another adult carry it around the block while you practice checking the app. Do not use an unleashed dog for testing. The goal is to understand the delay, uncertainty, and interface while everything is calm.
Pay attention to three things: whether the last seen location is recent, whether the map position is precise enough to act on, and whether the sound or nearby-finding feature is useful in your real environment. A last seen point near a busy street, apartment complex, or wooded edge still requires careful searching; it is not a guarantee that your dog is standing exactly on that dot.
Step 5: Know the lost-pet recovery limits
An AirTag is a Bluetooth item tracker that can report location when it is detected through Apple’s network. It is not a GPS dog tracker with continuous location reporting, escape alerts, or purpose-built lost-dog recovery behavior. That distinction matters most when a dog bolts fast, crosses into low-traffic areas, or disappears where few people carry nearby Apple devices.
In a suburban neighborhood, the tag may be found by passing phones often enough to create useful clues. On a farm road, deep trail, hunting property, or remote campground, there may be long gaps with no helpful update. For that reason, owners in low-density areas should read why AirTag (2nd Generation) is not a GPS dog tracker for rural dogs before relying on Bluetooth alone.
Also remember that the AirTag is attached to the collar, not the dog. If the collar slips off, breaks, is removed by someone, or gets snagged on a fence, you may find the collar while the dog has moved on. Keep a microchip registration current, use a visible ID tag, and store recent photos of your dog from multiple angles.
Step 6: Build a calm first-15-minutes routine
The first minutes after a dog slips out are stressful, so decide now what you will do. Open Find My, check the AirTag’s latest location, and note the time of the update. If the location is near home, search quietly and avoid sending a panicked crowd chasing the dog. Many lost dogs circle familiar scent trails or hide close by when frightened.
- Bring a leash, high-value treats, and a familiar blanket or toy.
- Move toward the last seen area, but keep scanning yards, porches, parked cars, drainage areas, and tree lines.
- Ask one person to monitor the app while another searches on foot.
- Do not yell repeatedly if your dog is fear-reactive; use calm recall cues and body language.
- If the location updates, record the new time and direction rather than chasing blindly.
If you want a community-assisted option, tools like neighborhood posts and local lost-pet groups can complement an AirTag clue. The tag may tell you where to look next; people nearby may provide the sighting that turns that clue into a recovery.
When a Bluetooth tag is not enough
A Bluetooth collar tag is most defensible as a backup layer: useful, lightweight in concept, and easy to add to an existing recovery plan. It is not the right primary tool for every escape risk. Dogs that jump fences, chase deer, slip harnesses on hikes, travel frequently, or live where nearby devices are sparse usually need a different level of tracking support.
For dogs with repeated escape behavior, a purpose-built GPS collar may be a better primary recovery tool because it is designed around pet location rather than item finding. One mainstream example to research is the Fi Series 3 Smart Collar, though any GPS option still depends on its own coverage, battery, subscription, fit, and setup limits.
Ongoing checks after setup
Once the AirTag and TagVault are on the collar, treat them like safety gear rather than a set-and-forget accessory. Add a quick inspection to your normal routine.
- Daily glance: Check that the mount is still seated correctly and has not shifted into a rubbing spot.
- After rough play: Inspect the collar if your dog wrestles, swims, rolls, or pushes through brush.
- After grooming: Recheck collar fit because coat length can change how the mount rests.
- Before travel: Open Find My and confirm the tag is visible before leaving home.
- Battery awareness: Watch for battery notices or status information in the app, and do not ignore low-power warnings.
Small dogs, puppies, and dogs with thin coats deserve closer observation during the first few days. If you see hair loss, redness, avoidance, or chewing, remove the setup and reconsider the mounting position or whether this accessory is a good fit for that dog.
Questions people ask
Can I use the TagVault mount on a harness instead of a collar?
Only use it on a harness if the mount’s current instructions allow that attachment style and the harness position does not rub, twist, or interfere with movement. A chest or shoulder placement can be more likely to scrape the ground, catch on brush, or bother the dog while lying down.
Will an AirTag help if someone finds my dog?
It can help create a location clue, but it should not replace visible identification. A readable ID tag with your phone number is still faster for a neighbor, postal worker, or hiker who has your dog in front of them.
Is this safe for dogs that chew collars?
Use extra caution. If your dog can reach and chew the mount, remove it and choose a different recovery strategy. A damaged holder can become a failure point, and no tracker mount is worth creating a chewing hazard.
Main lessons
The safest way to think about an AirTag dog collar is as one layer in a broader recovery plan. The Apple tag may help you find a collar location when nearby devices detect it, and the Elevation Lab TagVault AirTag Dog Collar Mount can make collar attachment cleaner than a dangling holder. But the setup still depends on network presence, collar retention, dog comfort, and your ability to act calmly on imperfect location clues.
Set it up before you need it, test it in the places your dog actually goes, keep your ID and microchip information current, and be honest about your dog’s escape risk. For some families, Bluetooth is a useful neighborhood backup. For others, especially rural dogs and serious runners, it should sit behind a more capable GPS-based recovery plan.