A tracker can only help when it sits where it can see the sky, stay secure, and avoid rubbing your dog raw. The goal is to fit a GPS dog collar snugly enough that the device stays upright, but comfortably enough that your dog can pant, sniff, nap, and move normally. Small changes in collar height, rotation, and strap tension can mean the difference between a clean location update and a confusing dot that lags behind your dog.
Think of collar positioning as part safety habit, part signal habit. It matters in a fenced yard, on a neighborhood walk, at a highway rest stop, and on the trail when your dog is weaving through brush or moving in and out of tree cover.
In brief
- Place the GPS unit on the upper side or top of the neck unless the manufacturer’s instructions say otherwise.
- Keep the collar snug enough that it does not spin freely, sag under the throat, or bounce when your dog trots.
- Leave enough room for normal breathing, panting, swallowing, and coat movement.
- Check the fit while your dog is standing, sniffing with the head down, lying down, and turning sharply.
- Test the tracker outdoors before trusting it during a gate escape, road trip, or off-leash recall session.
Why position affects GPS collar signal
Most dog trackers work best when their GPS antenna has a clearer path to the sky. A collar that rotates under the throat, sits low on the chest, or gets buried under thick coat can make updates less consistent. Cellular-based trackers also depend on network coverage, so a perfect collar fit cannot fix a dead zone, but it can help the device perform as well as conditions allow.
The dog’s body can also get in the way. If the tracker hangs against the underside of the neck, the device may be blocked by the dog’s head, chest, or shoulder as they move. On a small dog, even a slightly oversized tracker can swing from side to side. On a deep-coated dog, fur can push the unit away from the angle it was designed to hold.
The practical takeaway is simple: the tracker should not be treated like a decorative tag. It needs a stable working position, much like a headlamp needs to face forward or a phone needs signal before a map can update.
Step 1: Start with the collar high on the neck
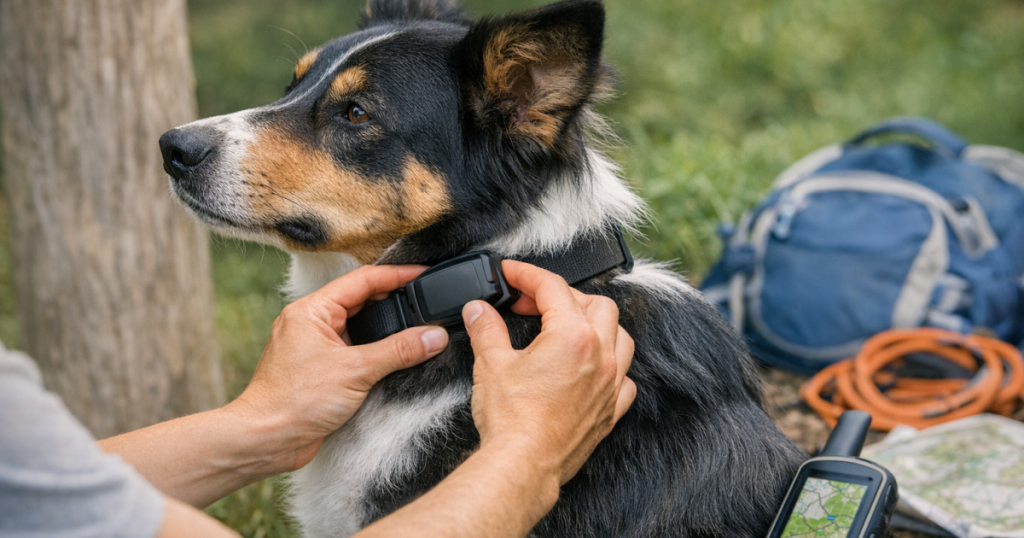
Begin with your dog standing calmly. Place the collar higher than a loose tag collar, generally on the middle-to-upper part of the neck rather than low near the shoulders. A low collar is more likely to slide, twist, and pull the tracker under the throat when your dog lowers their head to sniff.
For many GPS collars, the best starting point is high enough to stay stable but not so high that it crowds the jaw. If your dog has a short neck, heavy wrinkles, or a very thick ruff, you may need to make smaller adjustments and check comfort more often.
The comfort check
- You should be able to slip fingers under the collar without forcing them.
- The collar should not leave deep impressions in the coat or skin after normal wear.
- Your dog should be able to yawn, pant, drink, and sniff the ground without resistance.
- If the collar migrates down the neck within a few minutes, it is probably too loose or too heavy for that position.
Step 2: Keep the GPS unit from rotating underneath
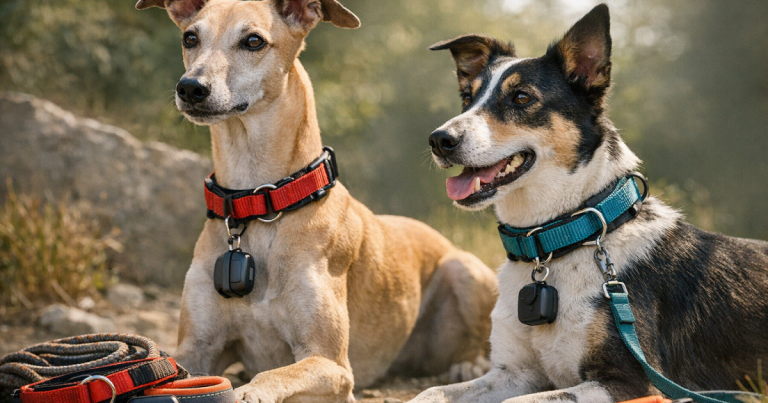
Once the collar height is right, focus on where the device sits. Unless the brand gives different instructions, aim to keep the GPS unit on the top or upper side of the neck rather than hanging directly underneath. A tracker that keeps rotating below the throat is harder to trust because its position changes every time the dog shakes, pulls, rolls, or drops their head.
Fasten the strap, then gently rotate the collar by hand. It should move a little, because a collar that cannot move at all may be too tight. But it should not spin freely around the neck. If the device swings like a pendant, tighten gradually or consider whether the collar width, attachment style, or device size is a poor match for your dog.
For integrated smart collars, follow the brand’s orientation instructions first. For clip-on trackers, use a secure mount that holds the device flat and stable. A dangling clip may be convenient for a quick walk, but it is usually less reliable for active dogs who roll in grass, crash through brush, or wrestle with housemates.
Step 3: Match the setup to your dog’s body shape
There is no single perfect collar position for every dog. A 12-pound terrier, a 55-pound cattle dog, and a 90-pound hound all create different fit problems. The right answer is the position that keeps the tracker stable without causing pressure, rubbing, or constant rotation.
- Small dogs: Watch for tracker weight and bulk. If the device pulls the collar down, the unit may end up under the throat no matter how carefully you adjust it.
- Long-coated dogs: Part the coat before fastening the collar so you are fitting to the dog’s neck, not just compressing fur. Recheck after the coat settles.
- Deep-chested or narrow-headed dogs: Make sure the collar cannot slip forward over the head when your dog backs up, ducks, or pulls away.
- Fence jumpers and door dashers: Prioritize a secure, repeatable fit. A tracker that sits beautifully indoors but twists during a sprint is not ready for escape-prone behavior.
- Trail dogs: Check for rubbing at the edges of the tracker after hikes, especially where sweat, dust, and wet coat can increase friction.
If you use a collar-style tracker such as the Fi Series 3 Smart Collar, the collar itself controls the tracker’s position. That makes sizing especially important: too loose and the device may rotate; too tight and everyday comfort suffers.
Step 4: Remove anything that pushes the tracker out of place
ID tags, rabies tags, leash rings, lights, bells, and training tabs can all crowd the same small space on the collar. They do not automatically ruin tracking, but they can push the GPS unit sideways, make the collar heavier on one side, or encourage the whole collar to rotate.
A simple fix is to separate jobs. Keep the GPS device on the collar section where it can stay stable. Move dangling ID tags to a different ring if your collar allows it, or use a flat slide-on ID plate where appropriate. If your dog wears a harness for leash walks, avoid clipping the leash to the GPS collar unless that is how the product is intended to be used.
This is also a good moment to check the basics: current ID tag, secure buckle, clean contact points where relevant, and no cracked collar hardware. GPS is useful, but it should sit alongside low-tech recovery backups, not replace them.
Step 5: Do a movement test before relying on the tracker
A collar can look perfect while your dog is standing still and fail the first time they act like a dog. After fitting, let your dog move naturally for several minutes. Watch the tracker while they sniff, shake off, jog, sit, lie down, scratch, and turn around.
- If the device ends up under the throat, adjust the strap or attachment.
- If the collar slides toward the shoulders, raise it and check snugness again.
- If your dog keeps pawing at the tracker, look for pressure, rubbing, or a bulky edge.
- If the tracker bounces visibly while trotting, the mount or collar may not be stable enough.
- If the collar leaves marks after a short session, loosen it or reassess the size and shape.
Repeat this check after rain, grooming, weight changes, seasonal coat changes, and any time you swap collars. A fit that worked in summer may change when a thick winter coat grows in or after a close trim.
Step 6: Test signal in the places your dog actually goes
Once the collar stays put, take the tracker outside and test it where you would most need it. Walk the fence line, driveway, side gate, garage door, trailhead, or campsite loop. The goal is not to create a laboratory test; it is to learn how your tracker behaves in real places where your dog could disappear.
Watch for delayed updates near buildings, heavy tree cover, ravines, metal structures, or rural roads with limited cellular service. If the tracker struggles in one corner of the yard, that matters when you set alerts. Our guide to setting reliable safe zones on a dog tracker explains why fence lines, app maps, and real-world escape paths do not always line up perfectly.
For hiking and camping, collar position is only one part of the plan. Remote areas may limit cellular updates, and battery use can change with settings, terrain, and how often the tracker is searching for a connection. Before a no-service trip, review how to prepare your dog tracker for no-service hikes so you are not learning those limits after your dog bolts after wildlife.
Common positioning mistakes
- Letting the device hang like a tag: A dangling tracker may be easier to attach, but it can swing, flip, and sit at inconsistent angles.
- Fitting over a thick coat without checking the neck underneath: Fur can hide a collar that is actually too loose once the dog starts moving.
- Putting every accessory on one collar: Too much hardware can rotate the tracker away from its best position.
- Trusting one indoor test: GPS performance should be checked outdoors, in motion, and in the areas your dog uses most.
- Assuming signal equals recovery: A tracker helps you respond faster, but it still depends on fit, power, coverage, settings, and your recovery plan.
FAQ
Should a GPS dog collar be tight?
It should be snug, not tight. The collar needs enough tension to stop the tracker from spinning underneath the neck, but your dog should still breathe, pant, drink, and move comfortably.
Where should the GPS unit sit on my dog?
For most collars, start with the unit on the top or upper side of the neck, then follow the manufacturer’s instructions for that model. Avoid letting it hang under the throat like a loose tag.
Can poor collar fit cause false safe-zone alerts?
It can contribute to messy location behavior, but it is not the only cause. Coverage gaps, GPS drift, buildings, trees, and safe-zone settings can also affect alerts.
How often should I recheck the fit?
Check it after grooming, weight changes, heavy rain, long hikes, collar swaps, and seasonal coat changes. For growing puppies, check much more often.
Is a harness better for GPS tracking than a collar?
Only if the tracker is designed to be worn that way. Many GPS devices are built for collar placement, so moving one to a harness can change its angle, stability, or security.
What to remember
The best GPS collar position is stable, comfortable, and repeatable. Keep the tracker high enough that it does not sag, oriented so it is not buried under the throat, and snug enough that normal movement does not spin it around the neck.
Then test it before there is an emergency. A few minutes of fitting, walking, and checking can give you a much clearer sense of what your tracker can do, what it cannot do, and where your recovery plan needs backup.